Goya F-11 Restoration
 |
| Finished |
 |
| Before |
Specs
Non-cutaway.
Concert size:
Body width: 360 mm.
Body length: 465 mm.
Body depth: 98 mm.
Spruce top with [fan, flamenco] bracing.
[flamed] Birch back & sides.
4-ply bound top.
Unbound back.
Mahogany neck with non-adjustable T-shaped duraluminum truss rod.
Unbound rosewood fingerboard with pearl dot inlay.
Rosewood bridge.
Double pickguards.
Nickel plated strip tuners.
Natural finish.
The Pickguards
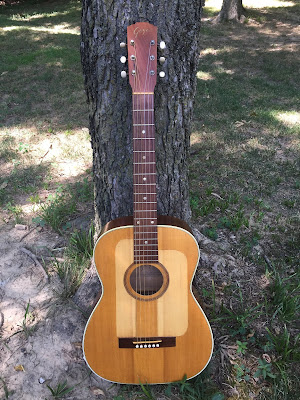
The pickguards were a thin, white plastic that had been stuck to the guitar on both sides of the soundhole, a very common flamenco guitar setup. Unfortunately the pickguards on these guitars commonly peeled up and off the guitar and mine was no exception. This one, however, was a nasty and sticky mess as the glue holding the pickguards had run and gotten all over the bridge and top. I used Goo Gone and careful scrubbing to remove the pickguards entirely and clean up the residue from where they used to lay. That wasn't a terrible task but it did take some time and multiple attempts to get the guitar clean enough for me to be happy. The most fascinating part, in my opinion, is how the lacquer underneath them stayed out of the light for 55 years and was stark white compared to the rest of the guitar. That color is what the entire guitar top would've looked like in 1963 if you picked one of these guitars up off of the assembly line.
The Bridge
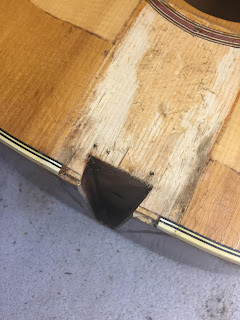
The guitars strings had torn through the body and into the bridge when I received it. Not only did the string ends travel up into the bridge but they also traveled forwards towards the neck, the worst one moving about 1/8th of an inch forward... I assume someone had put slightly heavier strings on the guitar, since the Goya catalogs mentioned that these guitars could take them all, and the lightweight bracing was just not able to take that much tension
The most common repair I do now-a-days is bridge plate reinforcing which involves gluing a very dense hardwood plate on top of the damaged bridge plate and drilling new string holes through that. The plate repair protects the top and bridge from the upward pull of the strings which improves the sound of the guitar as well as preventing bellying and other bridge damage.
 |
| The holes in the top and the bridge after I removed it |
 |
| I used fish glue to affix slivers of spruce into the slots in the top. I repeated the step with rosewood for the bridge |
Afterwards the bridge had slight damage due to my carelessness with a heater to remove the bridge and because of my repairs. So I hit the bridge with a couple thin coats of nitrocellulose lacquer which melted into the existing coats and cleaned that right up. I then polished the bridge and glued it back onto the body.
The Side Crack
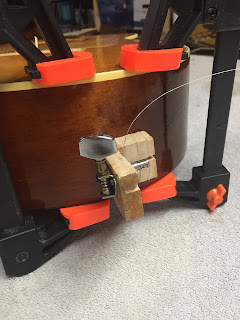
The guitar had a nice and nasty crack running along the lower bout that extended for about a foot so I got to work on repairing that. I used my homemade cleat-puller (that Pete from Driftwood gave me, he built them after seeing them on Stewmac's website) to pull the cleat tight against the body from the inside while I clamped the gap closed. I repeated this 4-5 times before I had managed to snugly close the crack and make it almost unnoticeable.
 |
| Unnoticeable might be a strong word but it doesn't look bad compared to what it was |
Neck Reset

I tried 3 times to hit the dovetail through the 13th fret but I missed every single time, unfortunately. I'm still learning in many aspects. Thankfully the guitar actually has a hole through the neck block where, supposedly, a bolt went through when these guitars were constructed as bolt-ons.

I used some spare brass tubing lying around to create a nozzle for my DIY neck steamer and I ran that hose into the soundhole and shot hot steam through the neck block. Doing so loosened the neck and I worked it out of the guitar. I noted how easy it was to remove the neck by using this method as it requires no drilling on the fingerboard (if you know its there before you drill...) and that Goya's dovetails were nice and snug.
 |
| My work after an hour or so of toiling with it |
Reassembly
Lastly I had to set the neck (which I overset and had to remove the neck for a second time to correct... More lessons learned), get the saddle and nut placed back into their rightful spots, lubricate the tuners, and find some suitable strings for the guitar.
The "G" in the logo was peeling off so I watered down some fish glue and covered the letter with it. After letting the glue dry, I used warm water to wipe off the excess and lucky for me the G has stayed in place!


No comments: